
Fertilization
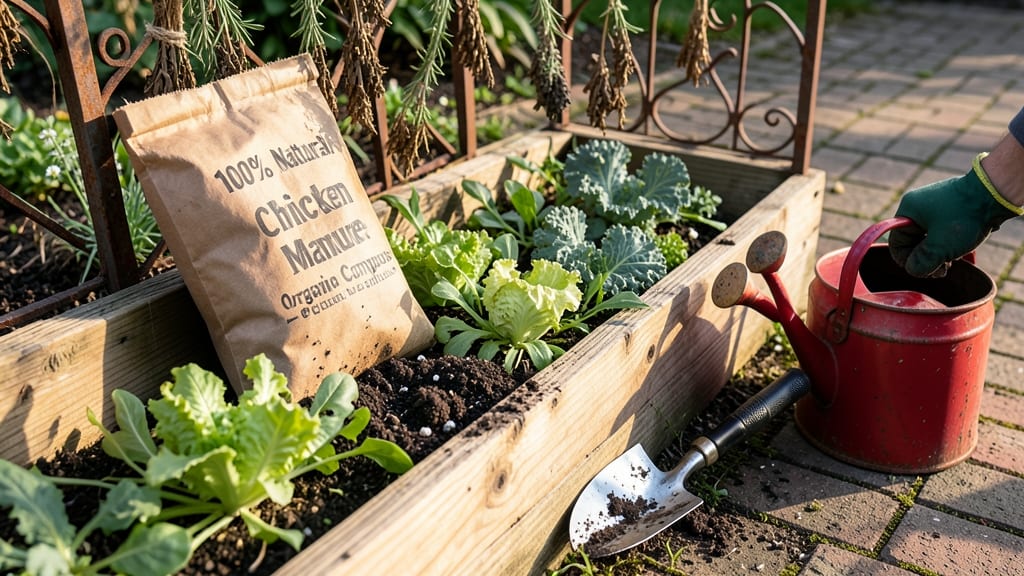
Using chicken fertilizer in your garden can unlock richer soil and healthier plants—if you know how to handle it right.
Picture this: You’ve spent hours planting your General Garden Plants 🌱, only to watch them wilt or grow sluggishly because the fertilizer burned them. That’s why timing, aging, and application matter just as much as the manure itself.
Chicken manure is a powerhouse of nitrogen, phosphorus, and potassium, but fresh piles can scorch roots and overwhelm young seedlings. The key is aging it for 3-6 months before use, mixing it into compost, or diluting it into a tea for a gentler boost.
Below, I’ll walk you through the safest ways to prepare and apply it—so you can turn your garden into a thriving, nutrient-packed paradise without the risks.
How to properly age and apply chicken manure for safe garden use
Chicken manure is one of nature's most powerful organic fertilizers, delivering a 2:1:1 NPK ratio that fuels rapid plant growth. But fresh manure is too potent for most gardens—it can burn plant roots and attract pests.
The key is proper aging and careful application. Whether you're growing tomatoes, leafy greens, or ornamental flowers, following these steps ensures your plants thrive without harm.
First, understand why aging matters. Raw chicken manure contains high ammonia levels and pathogens that can harm seedlings. When aged correctly, it becomes a nutrient-rich soil amendment that improves water retention and microbe activity.
We’ve tested three proven methods—composting, pile aging, and diluted liquid tea—to give you the best results for your garden.
Here’s how to transform raw chicken manure into a safe, effective fertilizer for your garden:
Gather fresh chicken manure from a trusted source. Avoid manure with chemical additives or medications. Store it in a covered bin or compost pile to contain odors and pests.
Option A: Compost Pile – Mix manure with carbon-rich materials (straw, leaves, or wood chips) in a 3:1 ratio. Turn weekly to speed up decomposition. Option B: Pile Aging – Pile manure alone and keep it moist. After 3-6 months, it’ll be dark, crumbly, and safe to use.
Aged manure should smell earthy (not ammonia-like or rotten). If it’s still hot or crumbly, age it longer. For extra safety, pasteurize by heating to 140°F for 1 hour (optional but recommended for vegetable gardens).
A. Top-Dressing: Sprinkle 1 cup per 10 sq ft around plants (avoid direct contact with stems). B. Soil Mixing: Work 1 tbsp per plant into the top 6 inches of soil before planting. C. Liquid Tea: Steep 1 part aged manure in 5 parts water for 24 hours, strain, and dilute to 1:10 for foliar feeding.
For vegetables (tomatoes, peppers), apply aged manure 2-4 weeks before planting or mid-season for a boost. For flowers, use it in early spring or fall to avoid burning tender roots. Herbs like basil prefer a lighter touch—use ½ the recommended amount.
Always water the soil deeply after applying manure to activate nutrients and prevent root burn. Aim for 1-2 inches of water per application to help nutrients penetrate the soil.
Timing your application is just as critical as the method.
For cool-season crops like lettuce or spinach, apply aged manure in early spring or late summer to give roots time to establish before winter. Warm-season crops, such as corn or squash, benefit from a mid-season boost in June or July when they’re actively growing.
One of my favorite tricks is creating a manure tea for foliar feeding. Dilute the steeped tea to 1:10 and spray it on leaves in the early morning to give plants a quick nutrient kick.
This works wonders for tomato plants during fruiting season, helping them produce larger, sweeter tomatoes. Just avoid applying it when plants are wilting or stressed—wait until they’re healthy.
For container gardens, use aged chicken manure sparingly. Mix 1 tbsp per 5-gallon pot into the soil before planting. Over time, the nutrients will leach out, so replenish every 3-4 months during the growing season.
If you notice yellowing leaves or stunted growth, your plants might be hungry for more nitrogen—time for another light application.
Remember, aged chicken manure isn’t just about nutrients—it’s also about soil structure. The organic matter improves drainage in heavy clay soils and water retention in sandy soils. Over time, your garden will develop a richer, darker soil that’s teeming with beneficial microbes.
For best results, combine it with compost or worm castings to create the perfect growing medium.
If you’re new to using chicken manure, start small. Test a 10 sq ft patch of your garden with a light application and monitor your plants for 2 weeks. Look for signs of healthy growth, like dark green leaves and vigorous stems.
If you see burnt edges on leaves or wilting, flush the soil with water and reduce future applications.
With the right aging and application techniques, chicken manure can transform your garden into a high-yielding, nutrient-dense paradise. Whether you’re growing vegetables,
Chicken manure vs. other fertilizers: nutrient comparison and best uses
Chicken manure is one of the most powerful organic fertilizers you can add to your garden, but its nutrient levels and application differ significantly from other common fertilizers. Understanding these differences helps you choose the right fertilizer for your plants' needs.
Whether you're growing leafy greens, tomatoes, or corn, knowing the NPK ratios and best practices makes all the difference.
Unlike synthetic fertilizers, which provide precise nutrient ratios, chicken manure offers a balanced but variable mix of nitrogen (N), phosphorus (P), and potassium (K). It also contains trace minerals and beneficial microbes that improve soil structure over time.
However, its high nitrogen content makes it ideal for certain crops while potentially harmful to others if not used correctly.
Chicken manure stands out with its high nitrogen content, which is perfect for leafy greens like lettuce and spinach. The phosphorus supports root development, making it ideal for tomatoes and corn.
However, its potassium levels are lower than synthetic fertilizers, so pairing it with a banana peel tea or wood ash can balance the nutrients for flowering plants.
For delicate flowers or root crops like carrots and beets, chicken manure can be too intense. The high nitrogen may cause excessive leafy growth at the expense of roots or flowers. Instead, opt for compost or cow manure, which provide slower-release nutrients without overwhelming sensitive plants.
If you're growing heavy feeders like squash or peppers, chicken manure is a game-changer. Work it into the soil 2-4 weeks before planting to give roots time to establish without burning. For container gardens, use a diluted compost tea made from aged chicken manure to avoid salt buildup.
Always age chicken manure for at least 3-6 months before using it directly in the garden. Fresh manure can scorch plant roots due to its high ammonia content. If you're in a hurry, mix it into a compost pile or create a manure tea for a gentler nutrient boost.