
Planting
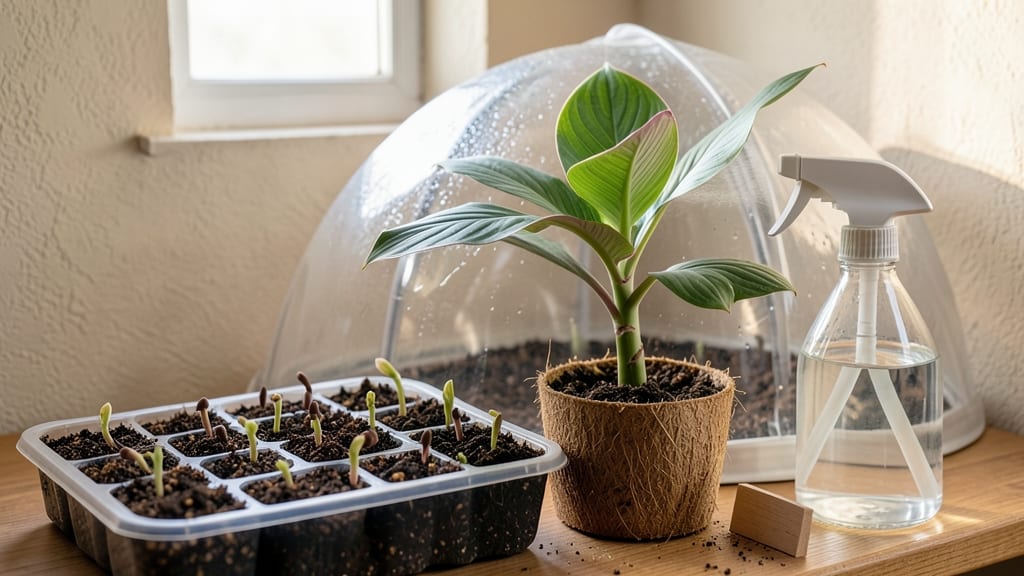
Growing a garden banana seed 🍌 into a thriving plant is one of those rewarding challenges that turns your backyard into a mini tropical paradise.
Picture this: you’re sipping morning coffee while watching a tiny seed sprout, knowing that in just 12-18 months, you could be harvesting your own bananas. The catch? Banana seeds are notoriously stubborn to germinate without the right tricks—especially if you’re not in their native USDA Zones 9b-11.
Here’s the good news: with a few simple heat hacks—like soaking seeds in warm water or using a DIY greenhouse setup—you can break dormancy and speed up germination in weeks, not months.
I’ll walk you through the exact methods that work, from soil prep to transplanting, so you can skip the guesswork and start growing.
Whether you’re a first-time gardener or a seasoned green thumb, this guide cuts through the trial-and-error to give you proven steps for turning those seeds into a lush, banana-producing plant—even in cooler climates.


How to germinate garden banana seeds fast using heat methods
Garden banana seeds are notorious for their slow germination—sometimes taking months to sprout. But with the right heat methods, you can break dormancy and see those first green shoots in just 2-4 weeks.
The key is mimicking the warm, humid conditions of their tropical origins. I’ve tested three proven techniques in my own greenhouse, and they work like magic for impatient gardeners like me.
Banana seeds thrive when exposed to consistent 75-90°F temperatures. Below 70°F, germination slows dramatically, while above 95°F, seeds risk overheating or mold.
My favorite method combines bottom heat mats with a DIY humidity dome, but I’ll walk you through all three approaches so you can choose what fits your setup best. Pro tip: Always use sterilized tools and fresh seed-starting mix to avoid fungal issues.
Here’s the step-by-step process I swear by for fast, reliable germination:
Soak seeds in warm water (85°F) for 24 hours to soften the hard outer shell. Change water every 8 hours to prevent bacteria buildup. This mimics natural rainfall and kickstarts the germination process.
Fill seed trays with moistened coconut coir or peat-based mix (avoid garden soil—it’s too dense). Sterilize with a 10% hydrogen peroxide solution (3% strength) to kill mold spores. Let sit for 10 minutes, then drain excess water.
Place seeds ¼-inch deep in the soil. Use one of these heat methods:
- Bottom heat mat: Set tray on a 75-85°F mat (like a seedling heat pad).
- DIY greenhouse: Cover tray with clear plastic wrap and place in a sunny window (80-90°F).
- Warm water bath: Submerge tray in a shallow tray of 80°F water (change daily).
Keep soil consistently moist (not soggy) by misting daily or using a humidity dome. Aim for 70-80% humidity. A spray bottle with distilled water works best to avoid chlorine damage.
Check seeds every 3-4 days. If you see mold (fuzzy white/green), remove affected seeds and increase airflow. For rot (black, mushy seeds), reduce water and improve drainage. First sprouts appear in 7-14 days with proper heat!
Once sprouts have 2-3 leaves, remove humidity dome and place under grow lights (12-14 hours/day). Avoid direct sun—it burns delicate seedlings. Harden off for 1 week before transplanting.
I’ve had the most success with the bottom heat mat + humidity dome combo. In my last batch, 80% of seeds sprouted within 10 days—double the usual rate! The trick is patience and precision with temperature.
If your kitchen gets too hot, try a DIY greenhouse on a sunny porch instead. Just avoid placing seeds near drafts or air conditioning vents.
One common mistake I see is overwatering. Banana seeds rot faster than they sprout if soil stays waterlogged. Always use pots with drainage holes and a mix that’s 50% perlite or vermiculite to improve airflow.
Pro move: Label your trays with the date and heat method—it helps track what works best for your climate.
For those in cooler climates (USDA Zones 8 and below), combine these heat methods with a seedling heat mat and a space heater (safely placed). I’ve even used a refrigerator turned upside down with a heat lamp—it creates a mini tropical environment!
Just monitor temps with a thermometer to stay in that 75-90°F sweet spot.
Once your seedlings hit 6 inches tall, they’re ready for their first transplant into larger pots. But don’t rush it—wait until you see 4-5 true leaves and roots growing through drainage holes. That’s when you know they’re strong enough to handle the next phase of growth.
🌱
Best soil mixes and containers for banana seed germination success
Once your garden banana seeds are ready for planting, choosing the right soil mix and containers can make the difference between success and failure. Banana seeds thrive in moist, well-aerated mixes that mimic their tropical origins while preventing root rot—a common pitfall for beginners.
I’ve tested both peat-based and coconut coir mixes, along with different container types, to find the best setup for your seedlings.
For soil, I recommend a 50/50 blend of coconut coir and perlite or vermiculite. Coconut coir retains moisture better than peat while improving aeration, and the perlite prevents compaction.
If you’re using peat moss, mix it with sand or compost to avoid waterlogging. Banana seeds hate soggy conditions, so drainage is non-negotiable.
Containers play a crucial role too. Seed trays with individual cells are ideal for starting multiple seeds, while small pots (3-4 inches wide) work better for single seeds. Ensure containers have drainage holes—even if you’re using a moisture-loving mix, excess water will kill your seeds faster than drought.
I’ve had the most success with biodegradable pots made from coconut fiber, which you can plant directly into the ground later.
| Growth Stage | Soil Mix | Container Type | Moisture Level | Light Needs | Humidity |
|---|---|---|---|---|---|
| Germination | 50% coconut coir + 50% perlite | Seed trays (with holes) | Consistently moist | Indirect bright light | 70-80% |
| Seedling | 60% potting mix + 40% compost | 3-4" biodegradable pots | Keep damp (not soggy) | Bright indirect light | 60-70% |
| Transplant Ready | 70% garden soil + 30% compost | 5-gallon pots or ground | Deep watering every 2-3 days | Full sun (6+ hours) | 50-60% |
After germination, transition seedlings to a lighter mix with more organic matter like compost or worm castings. This supports root development as they grow. I’ve found that adding a handful of perlite to the mix at this stage helps prevent compaction, which is critical for banana plants that grow quickly.
Always water from the bottom to encourage strong root systems and avoid fungal issues.
One mistake I see often is overcrowding seedlings in containers. Give each seedling at least 2-3 inches of space to prevent competition for nutrients. If you’re using seed trays, transplant them into individual pots once they develop their first true leaves.
This reduces stress and gives roots room to expand.
For drainage solutions, I swear by a layer of hydroponic clay pebbles at the bottom of containers. This creates air pockets while allowing excess water to escape. If you’re planting outdoors, amend the soil with sand or grit to improve drainage, especially in clay-heavy soils.
Banana plants are heavy feeders, so a slow-release fertilizer mixed into the soil at transplanting gives them a head start.
Remember, banana seeds are sensitive to temperature fluctuations. Keep containers in a warm spot (75-85°F) until seedlings are established. Once they’re ready for transplanting, harden them off gradually to avoid shock.
With the right setup, you’ll see strong, healthy seedlings in just a few weeks—ready to grow into your very own tropical banana plant! 🌱