
Picking
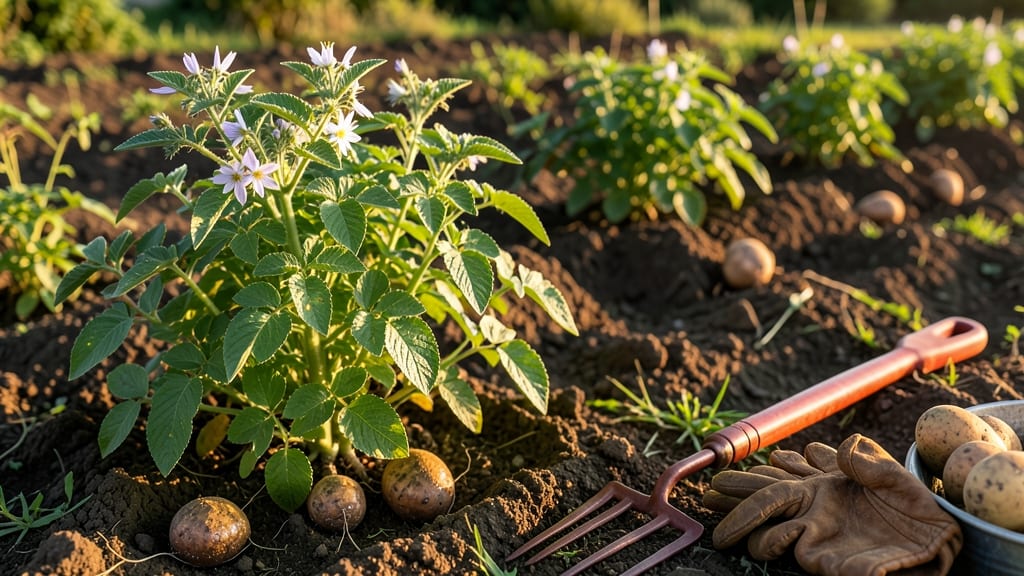
To pick potatoes from your garden at the perfect moment means the difference between tender, flavorful tubers and tough, inedible ones — and timing it right isn’t just about days after planting.
You’ve spent weeks nurturing your 🥔 plants, only to risk ruining them by digging too soon or too late. The key lies in watching for three clear signals: when the foliage yellows, when the skin resists a gentle squeeze, and whether the soil temperature has warmed enough to trigger maturity.
Whether you’re growing early varieties in Zone 6a or late-season spuds in warmer climates, knowing these cues saves you from wasted effort. Below, I’ll walk you through the foolproof tests to determine when your potatoes are truly ready — and how to handle them once they’re out of the ground.
From avoiding the green-tinged tubers that signal sunlight exposure to storing your harvest for months, this guide covers everything you need to turn your garden into a spud stash.


3 Reliable signs your potatoes are ready for harvest
Harvesting potatoes at the right time ensures you get sweet, tender tubers instead of tough, woody messes. But how do you know when they're ready? Unlike many veggies, potatoes don't give obvious above-ground signals until the very end.
That's why I rely on three expert-approved tests—leaf condition, tuber size, and soil readiness—that take the guesswork out of harvest timing.
First-time growers often make the mistake of digging too early, only to find tiny, underdeveloped potatoes that lack flavor. Or worse, they wait too long and end up with sprouting tubers or even rotting in the ground.
The good news? These three signs work for both new potatoes (harvested young) and mature potatoes (fully grown). Let me walk you through each one with my foolproof testing methods.
Pro Tip: Always harvest on a dry, sunny day to prevent soil from clinging to tubers. This makes cleaning easier and helps them cure properly afterward.
🌱 How to Test for Harvest-Ready Potatoes
- 1. Leaf Test: Gently pull back the foliage. If 75% of leaves have turned yellow-brown and are dying back (a process called senescence), it's time for mature potatoes. For new potatoes, leaves should still be green but lush.
- 2. Tuber Size Test: Dig a small test hole (6-8 inches deep). If tubers are 2-3 inches wide for new potatoes, harvest immediately. For mature potatoes, aim for 5+ inches in diameter. Use your thumbnail—if it sinks into the skin, they're not ready.
- 3. Soil Condition Test: Stick your finger 4-6 inches deep into the soil. If it's dry and crumbly (not muddy), the tubers have stopped growing. Wet soil means they'll keep expanding—or worse, rot. Pro tip: Stop watering 1-2 weeks before harvest to dry the soil.
💡 Remember: Early varieties (like Red Pontiac) mature in 60-70 days, while late varieties (like Russet Burbank) take 90-120 days.
Let me explain why the leaf test is my favorite. When potato plants start yellowing from the bottom up, it signals the plant is redirecting energy from leaves to tubers.
This natural process means the potatoes have reached peak starch development. I've found that waiting until half the leaves are dead gives the best balance of size and flavor.
For new potatoes, timing is even trickier because you're harvesting before the plant fully matures. That's why I always check tuber size every 2 weeks starting at 40 days.
If they're golf-ball sized (1.5-2 inches), they're perfect for immediate eating. These little guys have delicate skins and a creamy texture that mature potatoes can't match.
Don't overlook the soil test—it's the most overlooked clue. I've learned the hard way that digging in wet soil can cause tubers to split or develop fungal diseases. The ideal soil should feel like a dry sponge when you squeeze it.
If it sticks to your fingers, wait a few days. This test works especially well in containers or raised beds, where soil dries out faster.
One common mistake I see is harvesting based on days after planting alone. While early varieties might be ready at 60 days, late varieties need 100+ days. Instead, I combine all three tests for accuracy.
For example, I might see yellow leaves at 70 days but still find small tubers. That tells me to wait another week—even if the leaves look ready.
Here's a bonus tip: If you're growing organic potatoes, reduce watering 2 weeks before harvest to improve skin set. This creates a thicker, more protective skin that stores better. Just be careful not to let the soil dry out completely, or the tubers will shrink and toughen.
Finally, always handle harvested potatoes gently. Bruised tubers won't store well and may develop soft rot. I use a garden fork to loosen soil first, then carefully lift potatoes to avoid damaging their skins.
After harvesting, let them cure in a dark, dry place for 24 hours to toughen their skins naturally.
🌱 Now that you know these three foolproof signs, you'll never second-guess your potato harvest again. The key is patience—waiting for all three signals ensures you get the best possible tubers from your garden.
Best harvest times by potato variety (early vs. late season)
Not all potatoes ripen at the same time—your harvest window depends on whether you planted early-season or late-season varieties. Early types like Red Bliss mature in 60-70 days, while Russet potatoes need 90-120 days.
Even within the same variety, new potatoes (harvested early) and mature tubers (harvested later) have different ideal harvest times.
Your climate zone also plays a role. In Northern climates (USDA Zones 3-5), early varieties like Yukon Gold should be ready by late June, while late varieties like Kennebec won’t be ready until September.
In Southern climates (Zones 7-10), you can stretch your harvest from May to October depending on the variety.
Here’s a quick reference for harvest timing by variety and planting type, tailored to both Northern and Southern growing seasons:
| Variety | Type | Days to Maturity | Northern Harvest Window | Southern Harvest Window |
|---|---|---|---|---|
| Red Bliss | Early | 60-70 | Late June - Early July | May - June |
| Yukon Gold | Mid-Early | 70-80 | Late July - Early August | June - July |
| Russet | Late | 90-120 | September - October | July - August |
| Kennebec | Late | 100-110 | Late September | August - September |
| Fingerling (e.g., Purple Viking) | Mid-Late | 80-90 | August | June - July |
For new potatoes, you can start digging 2-3 weeks before the main harvest window—look for 2-inch tubers with thin skin.
These are perfect for immediate cooking and won’t store long-term. Mature potatoes, on the other hand, need to fully cure in the soil for 2-3 weeks before harvest to develop their flavor and storage life.
Pro tip: If you’re in a shorter growing season, prioritize early varieties like Red Norland or Adirondack Blue for a June harvest. For longer seasons, mix early and late varieties to extend your harvest from June to October.
Just remember—late blight risks rise in humid Southern climates, so harvest late varieties before the first frost or when foliage starts to yellow and die back.
Always dig dry soil to avoid damaging tubers, and let harvested potatoes cure in a dark, dry place for 1-2 weeks before storing. This step is critical for preventing rot and sprouting during long-term storage.