
Tools
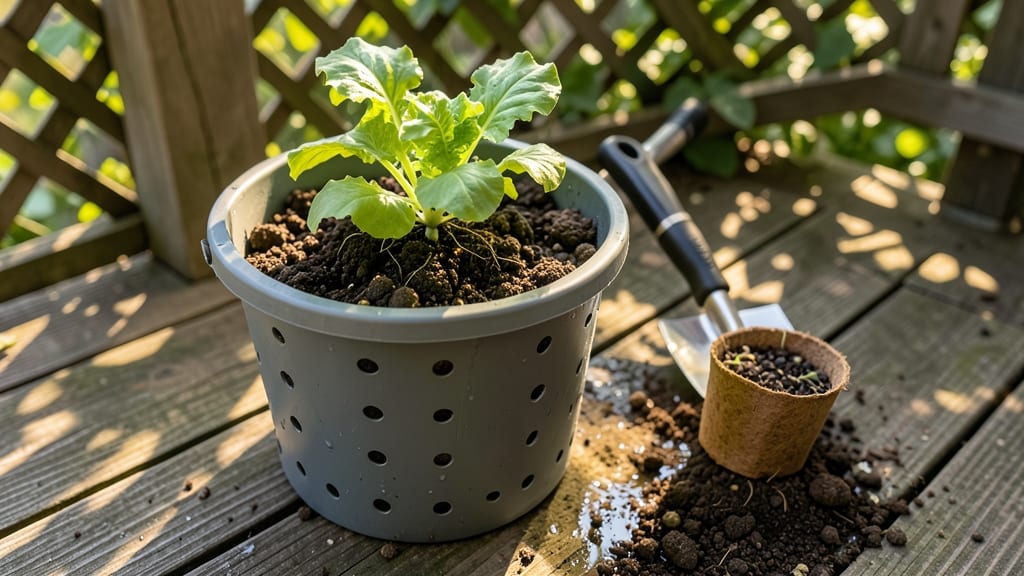
To master bucket gardening 101, you only need a few containers, some soil, and a sunny spot—no sprawling yard required.
If you’ve ever dreamed of growing fresh herbs, veggies, or flowers but lack space, bucket gardening is your game-changer—transforming tiny balconies and cramped yards into thriving green oases with minimal effort.
This beginner-friendly guide covers everything from picking the right 5-gallon buckets to choosing plants that thrive in containers, like lettuce, cherry tomatoes, and basil. You’ll also learn how to mix soil for perfect drainage and set up a system that keeps your garden water-efficient and easy to maintain.
By the end, you’ll have a space-saving layout that fits your balcony or patio, plus tips to avoid common mistakes like overwatering or poor drainage. Ready to turn your small space into a productive garden?
Bucket gardening basics: containers, soil & plants that thrive
Bucket gardening turns limited space into a lush, productive garden with minimal effort. Whether you're growing herbs on a balcony or veggies in a courtyard, the right containers and soil mix make all the difference.
I’ve tested 5-gallon buckets, fabric grow bags, and even repurposed plastic bins—here’s what works best for beginners.
Start with containers that have drainage holes to prevent root rot. 5-gallon buckets are ideal for tomatoes and peppers, while fabric grow bags (like Smart Pots) improve airflow for herbs and leafy greens.
Avoid glazed ceramic or solid plastic—they trap moisture and stifle roots. Pro tip: Drill extra holes if your container lacks them!
Soil is the secret sauce for bucket gardening. A well-draining mix of 50% potting soil, 30% perlite/vermiculite, and 20% compost keeps roots happy. Avoid garden soil—it compacts and blocks drainage.
For acid-loving plants like blueberries, mix in peat moss or pine bark fines. Always sterilize reused containers with a 10% bleach solution to kill pests.
Now, let’s talk plants! These 10 beginner-friendly varieties thrive in buckets with minimal fuss:
Herbs: Basil, cilantro, parsley, and mint (use a separate container—it spreads aggressively!). Cherry tomatoes and peppers are container superstars, while lettuce, spinach, and radishes grow fast for quick harvests. For flowers, marigolds repel pests, and nasturtiums add color while edible!
Here’s a quick reference for care—sunlight, water, and harvest times at a glance:
Watering is critical—buckets dry out 3x faster than ground soil. Stick your finger 1 inch deep; if dry, water until it drains from the bottom. Morning watering prevents fungal diseases, and mulch (like straw) retains moisture.
For herbs, let the topsoil dry slightly between waterings to avoid root rot.
Place your buckets where they’ll get the most sunlight. South-facing windowsills or balconies work best for 6+ hours of sun. Use reflective surfaces (like white walls) to bounce extra light onto shady spots. If indoors, supplement with grow lights (12-16 hours/day) for leafy greens and herbs.
Fertilize lightly during the growing season—every 4-6 weeks with a balanced 10-10-10 fertilizer. Overfeeding leads to leafy growth but fewer fruits. For tomatoes and peppers, switch to a 5-10-10 formula once flowers appear to boost fruiting. Always water before fertilizing to avoid burning roots.
Prune regularly to encourage bushier growth and better airflow. Pinch off the tips of herbs like basil to prevent flowering, and remove yellow leaves immediately. For tomatoes, prune suckers (the small shoots between stems) to focus energy on fruit production. A clean bucket
Creative bucket gardening layouts for small spaces
Small spaces don’t mean small dreams—bucket gardening lets you grow a lush edible garden on a balcony, patio, or even a sunny windowsill. The key is thinking vertically and multi-level.
With just a few repurposed buckets and some creative arranging, you can maximize every inch of space while keeping maintenance simple. Whether you’re growing herbs for cooking or veggies for salads, these layouts prove that tiny spaces can yield big harvests.
Before diving in, grab materials like 5-gallon buckets, a sturdy racking system, and lightweight garden fabric for liners. Place your setup where it gets at least 6 hours of sunlight—south-facing windows or balconies work best.
Start with fast-growing plants like basil, lettuce, or cherry tomatoes to see quick results and stay motivated.
5 Space-Saving Bucket Garden Layouts
-
1. Stacked Bucket Herb Garden
Use 3-4 buckets stacked with wood spacers. Plant basil, parsley, and thyme in each level. Add a drip irrigation line for easy watering. -
2. Balcony Window Farm
Hang buckets from a balcony railing using carabiners. Grow lettuce, spinach, and radishes in shallow 3-gallon containers. -
3. Tiered Rack Vegetable Tower
Build a 3-tier wooden rack. Place tomatoes, peppers, and strawberries on each level. Ensure each bucket has its own drainage tray. -
4. Hanging Bucket Flower Basket
Repurpose a macramé hanger for trailing plants like nasturtiums or petunias. Use a 1-gallon bucket for lightweight blooms. -
5. Multi-Level Pallet Garden
Stack buckets on a wooden pallet with 2x4 supports. Plant green onions, chives, and peppers for a mix of heights and textures.
💡 Pro Tip: Label each bucket with plant names and watering schedules to stay organized!
For the Stacked Bucket Herb Garden, start by drilling drainage holes in the bottom of each bucket. Line them with landscape fabric to prevent soil from washing out, then fill with a mix of potting soil and compost.
Place the smallest bucket on top and secure with wooden blocks to create stability. Add a self-watering reservoir at the base to reduce maintenance.
If you’re working with a limited balcony space, the Balcony Window Farm is a game-changer. Use plastic-coated wire baskets or repurposed buckets with handles. Suspend them at varying heights so all plants get equal sunlight.
This layout is perfect for leafy greens that thrive in cooler temperatures and can tolerate partial shade.
Don’t overlook the DIY tiered rack—it’s one of the most versatile designs. Use pressure-treated wood for durability and space the tiers at least 12 inches apart for easy access.
Add wheels to the bottom for mobility, so you can move your garden to follow the sun or protect it from rain. This setup works beautifully for tomatoes and peppers, which need room to grow.
For a touch of aesthetic appeal, try the Hanging Bucket Flower Basket. Choose trailing plants that will spill over the edges, creating a cascading effect. This layout is ideal for small patios or deck railings and adds a pop of color to your outdoor space.
Just remember to water these buckets more frequently, as they dry out faster when exposed to wind.
Finally, the Multi-Level Pallet Garden is perfect for those who love a rustic, industrial look. Stain or paint the pallet to match your decor, and arrange buckets in a zigzag pattern for visual interest.
This layout is great for herbs and small vegetables that don’t require deep soil. Plus, the elevated design keeps pests like slugs at bay.