
Container Gardens
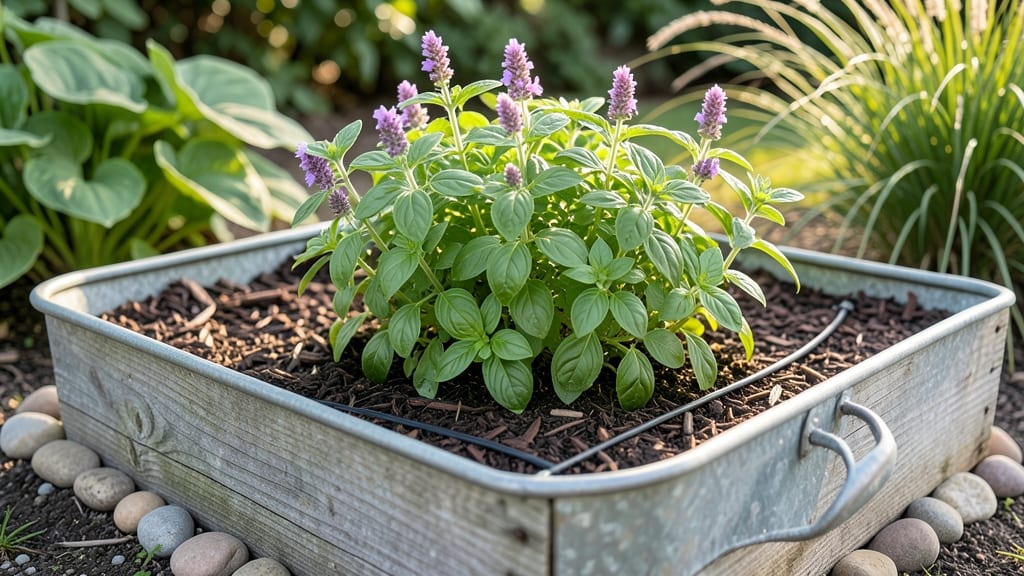
Repurposing old water troughs into raised garden beds 🌱 is a game-changer for gardeners with limited space or creative flair.
Picture this: a sturdy, weathered trough transformed into a thriving mini-farm, perfect for herbs, lettuce, or even strawberries. It’s not just about saving space—it’s about turning overlooked materials into something both functional and stylish.
You might wonder if these containers can handle the job, but with the right drainage, soil depth, and plant choices, they’ll outperform traditional beds. Plus, they’re lightweight enough to move around, so you can chase the sun or protect your plants from unexpected weather.
In this guide, I’ll walk you through the easiest ways to convert troughs into productive garden beds, from picking the right materials to selecting plants that thrive in tight quarters. Let’s get growing!
How to convert water troughs into functional raised garden beds
Repurposing old water troughs into raised garden beds is one of my favorite DIY gardening hacks—it’s budget-friendly, eco-conscious, and perfect for small spaces.
Whether you’ve got rusted steel troughs, sturdy plastic livestock containers, or weathered wooden feeders, these containers can become thriving mini-gardens with just a few modifications. The key is transforming their original purpose—water storage—into a nutrient-rich growing environment for your favorite plants.
Before diving in, consider your trough’s material. Steel troughs offer durability but may rust over time, while plastic troughs resist weathering but can degrade in intense sunlight. Wooden troughs add rustic charm but require sealing to prevent rot.
Each material has unique advantages, so choose based on your garden’s needs and your DIY comfort level.
Here’s how to turn your water trough into a functional, high-yield raised bed in just a few steps:
Step 1: Clean and Inspect Your Trough
Start by thoroughly cleaning the trough to remove dirt, algae, or debris. For steel or plastic troughs, use a mild bleach solution (1 part bleach to 10 parts water) to disinfect.
Scrub away any rust spots with a wire brush, and let it dry completely. If the trough has sharp edges, sand them down for safety.
Step 2: Drill Drainage Holes
Drainage is critical to prevent root rot and waterlogging. Use a power drill with a hole saw or spade bit to create ¼-inch to ½-inch holes along the bottom of the trough.
Space them 6-12 inches apart for optimal airflow. If your trough is very wide, add holes along the sides too.
Step 3: Add a Protective Liner (Optional)
For soil retention and to protect the trough’s interior, line the bottom with landscape fabric or a heavy-duty plastic liner. Secure it with staples or rocks to prevent soil from washing out through the drainage holes.
This step is especially useful for lightweight plastic troughs that might warp under wet soil.
Step 4: Prepare the Soil Mix
Fill your trough with a well-draining, nutrient-rich soil mix. Avoid garden soil, which compacts easily. Instead, blend equal parts potting soil, compost, and perlite or vermiculite for aeration.
For deep-rooted plants like tomatoes or carrots, aim for a minimum soil depth of 12 inches. Shallow-rooted herbs and lettuce thrive in 6-inch depths.
Step 5: Modify for Plant Support
Repurpose the trough’s original lid as a trellis for climbing plants like beans, cucumbers, or nasturtiums. Secure it vertically on the inside using zip ties or screws. For taller plants, add bamboo stakes or wire mesh to the sides.
If your trough is long and narrow, consider dividing it into sections with wooden dividers for better organization.
Step 6: Choose the Right Plants
Opt for compact, shallow-rooted plants that thrive in containers. Herbs like basil and thyme, leafy greens such as lettuce and spinach, and small vegetables like radishes and bush beans are ideal.
Avoid large root crops like potatoes or deep-rooted perennials unless your trough is exceptionally deep. Succulents and strawberries also flourish in trough gardens.
Step 7: Position for Sunlight and Accessibility
Place your trough in a sunny spot that gets at least 6 hours of sunlight daily. Most vegetables and herbs need full sun, while a few shade-tolerant plants like parsley or chives can handle partial shade.
Ensure the location is easily accessible for watering and harvesting. Elevate the trough on bricks or cinder blocks if needed to improve drainage or visibility.
Step 8: Water and Maintain
Water your trough garden deeply 2-3 times per week, adjusting for rainfall. Raised beds dry out faster, so mulch the surface with straw or wood chips to retain moisture.
Monitor for pests like aphids or slugs and address them early with neem oil or diatomaceous earth. Rotate crops annually to prevent soil depletion.
One of my favorite cost-saving tips is to check local farms, livestock suppliers, or Facebook Marketplace for free or low-cost water troughs. A single trough can yield twice as many herbs or greens as an in-ground plot, making it a game-changer for urban gardeners.
Plus, the rustic aesthetic adds charm to patios, decks, or garden edges.
If you’re feeling creative, paint or stain your trough to match your garden’s theme. Galvanized steel troughs look stunning with a weathered gray finish, while wooden troughs can be stained to complement decking or fence colors. Just ensure any sealant is non-toxic and food-safe if you’re growing edibles.
With a little creativity and these simple modifications, your water trough will transform into a productive, space-saving garden that’s as functional as it is stylish. Happy growing! 🌱
Best plants for water trough raised garden beds: space-saving varieties
Water trough raised garden beds offer a compact yet productive growing space, perfect for herbs, vegetables, and flowers that thrive in contained environments. The key is selecting shallow-rooted, high-yield plants that adapt well to limited soil depth and consistent moisture retention.
I’ve curated a list of space-saving varieties that excel in these conditions, categorized by type for easy planning.
For herbs, opt for varieties like basil, thyme, and chives, which flourish in shallow soil and require minimal space. These sun-loving plants also pair beautifully with companion vegetables like lettuce or radishes.
Flowers such as nasturtiums or marigolds add color while deterring pests—ideal for small-space aesthetics and functional gardening.
Vegetables like bush beans, cherry tomatoes, and dwarf peppers are perfect for troughs, as they grow vertically or stay compact. These drought-tolerant varieties reduce watering frequency, making them low-maintenance choices. Pair them with fast-growing greens like spinach or arugula to maximize harvests in tight spaces.
When selecting plants, prioritize vertical growers like pole beans or cucumbers to maximize space. Use trellises or stakes to guide vines upward, freeing up ground area for other crops. For drought-resistant options, consider succulents or oregano, which thrive with minimal watering once established.
Companion planting is a game-changer in trough gardens. Pair onion or garlic with tomatoes to deter pests, or plant marigolds alongside herbs to repel insects naturally. These space-efficient pairings boost yields while keeping maintenance simple.
Always ensure your trough has adequate drainage and a well-draining soil mix to prevent root rot in shallow containers.
With the right plant selection and care, your water trough raised garden bed can become a high-yield, low-maintenance oasis. Start with 3-5 varieties to avoid overcrowding, and rotate crops annually to replenish nutrients. Happy growing! 🌱