
Tools
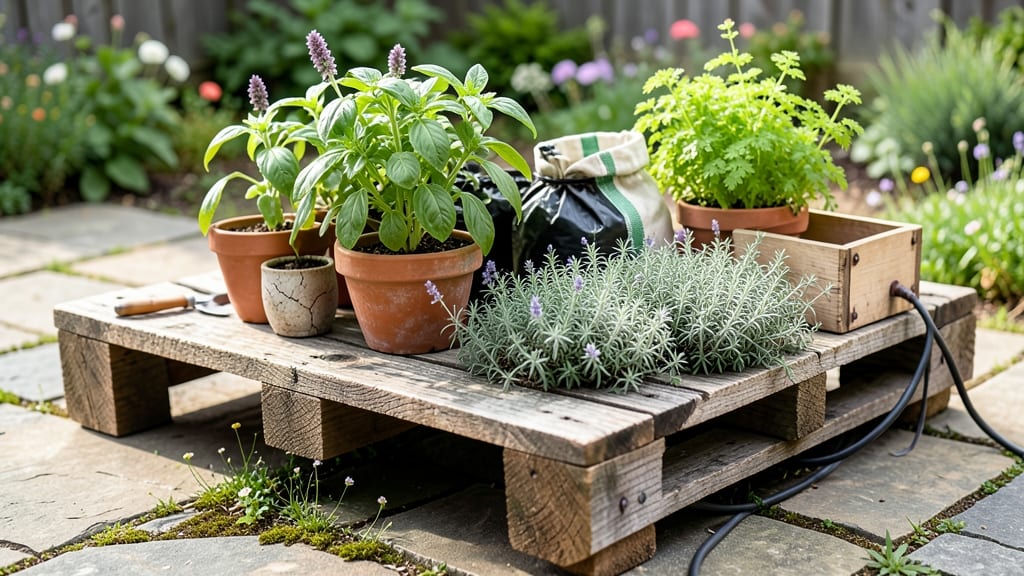
A pallet gardening table turns scrap wood into a mobile, space-saving planter that’s perfect for herbs, veggies, or flowers—no fancy tools or deep pockets required.
Picture this: a sturdy, customizable table you can roll from patio to balcony, loaded with thriving 🌱 General Pallet Garden Plants like tomatoes, basil, or marigolds. The best part? You’re not just saving money—you’re giving old pallets a second life while dodging the hassle of bulky raised beds.
Whether you’re working with 6a zone spring planting or just want a low-maintenance way to grow more, this project delivers flexibility and durability in under an hour. No green thumb? No problem. We’ll walk you through material choices, assembly tricks, and even creative tweaks like adding casters or tiered shelves.
Ready to build a planter that’s as practical as it is pretty? Here’s how to turn two pallets, a few screws, and a little elbow grease into a gardening game-changer.
How to build a sturdy pallet gardening table for beginners
Transforming old wooden pallets into a mobile gardening table is one of the most budget-friendly and creative ways to expand your growing space—without breaking the bank or sacrificing mobility.
This project requires minimal tools and materials, making it perfect for beginners eager to grow herbs, veggies, or flowers in a compact, movable planter.
The key is selecting the right pallet and reinforcing it for long-term durability, especially if you plan to move it frequently or expose it to the elements.
Before you start, gather your supplies: a heat-treated pallet (marked with "HT" for safety), 2x4 lumber for support, deck screws (2-3 inches long), a saw (hand saw or circular saw), sandpaper (80-120 grit), and a wood sealant or non-toxic paint for weatherproofing.
Safety first—wear gloves and a mask when sanding to avoid splinters or inhaling dust. This project takes about 60-90 minutes, depending on your skill level, and the results will be a sturdy, customizable planter that fits your garden’s needs.
Step-by-Step Guide to Building Your Pallet Gardening Table
-
Step 1: Choose and Inspect Your Pallet
Select a heat-treated pallet (marked "HT") to avoid toxic chemicals. Ensure it’s dry, free of cracks, and structurally sound. Avoid pallets with chemical stains or mold, as these can harm plants.
-
Step 2: Sand All Surfaces
Smooth rough edges and splinters with 80-120 grit sandpaper. Focus on the top and bottom of the pallet, as these will contact soil and plants. Wipe away dust with a damp cloth.
-
Step 3: Reinforce the Base
Cut two 2x4 lumber pieces to match the pallet’s length. Screw them underneath the pallet’s bottom slats using 2-3 inch deck screws (every 12 inches) to add stability. This prevents wobbling when moving or planting.
-
Step 4: Add Side Supports (Optional)
For extra durability, attach vertical 2x4 supports to the corners of the pallet using L-brackets or screws. This elevates the table slightly off the ground, improving drainage and airflow.
-
Step 5: Seal or Paint the Wood
Apply a non-toxic wood sealant or water-based paint to protect the pallet from moisture, UV rays, and pests. Let it dry completely (24-48 hours) before planting. Avoid oil-based paints, as they can leach chemicals into the soil.
-
Step 6: Add Casters (For Mobility)
Attach four heavy-duty casters (one to each corner) to the bottom of the reinforced base. This turns your table into a mobile planter you can easily move for sunlight or harvests. Use screws designed for outdoor use.
-
Step 7: Line with Landscape Fabric (Optional)
Place a layer of landscape fabric or burlap over the pallet’s slats to prevent soil from falling through the gaps. Secure it with staples or zip ties to keep it in place while allowing water drainage.
-
Step 8: Fill with Soil and Plant
Fill the pallet with high-quality potting mix or a blend of topsoil and compost (60/40 ratio). Plant your herbs, veggies, or flowers, leaving 1-2 inches between plants for growth. Water thoroughly to settle the soil.
One of the biggest advantages of a pallet gardening table is its versatility. You can use it to grow container-friendly plants like basil, lettuce, cherry tomatoes, or strawberries, or even create a herb spiral for efficient space use.
The slatted design allows excess water to drain, reducing the risk of root rot, while the mobility lets you rotate plants to follow the sun or protect them from harsh afternoon rays.
For long-term stability, avoid overloading the table with heavy plants like squash or pumpkins, which can strain the pallet’s structure. Instead, opt for lighter crops or reinforce the base further with additional 2x4 supports if needed.
If you plan to use the table in winter, consider adding insulated planter sleeves or moving it to a sheltered area to protect plants from frost.
Pro tip: Label your plants with small stakes or a chalkboard attached to the side of the table. This helps you keep track of what’s growing, especially if you’re experimenting with multiple varieties.
Over time, you’ll notice how the mobile design saves you time—no more bending or kneeling to tend to your garden!
Once your pallet gardening table is built, get creative with companion planting. Pair basil with tomatoes to repel pests, or plant marigolds around the edges to deter insects naturally. The possibilities are endless, and the best part? You’ve created a sustainable, low-cost solution that grows with your gardening skills.
🌱
Top 5 materials and tools for a long-lasting pallet garden table
A pallet garden table thrives on the right materials—durability, mobility, and plant health depend on your choices. Start with a heat-treated pallet (stamped "HT" or "MB") to ensure safety and longevity. Avoid chemically treated pallets (marked "MB" only) unless you're growing non-edible plants like ornamentals.
The slat spacing (typically 2-3 inches) is perfect for root growth and drainage, but you may need to adjust it based on your plants.
Next, gather stainless steel or galvanized screws (2-3 inches long) to secure the pallet to a sturdy base. These resist rust and corrosion better than basic deck screws. For the base, 2x4 lumber creates a stable foundation, while plywood adds smoothness for rolling.
If mobility is key, add heavy-duty casters (200+ pounds capacity) to the base corners for easy movement.
🌱
Don’t overlook wood sealant—it’s your first line of defense against rot and moisture damage. Use a waterproof sealant like spar urethane or linseed oil for a natural finish. Apply it after sanding the pallet smooth to prevent splinters.
For extra protection, consider adding a drip tray or landscape fabric beneath the pallet to catch excess water and deter pests.
Optional upgrades can transform your table into a multi-functional gardening hub. Add pegboard strips to the sides for hanging tools, or attach a small shelf underneath for potting supplies. If growing herbs or greens, install a drip irrigation system along the edges for consistent watering.
For heavier plants like tomatoes or peppers, reinforce the base with additional crossbeams to prevent wobbling.
Finally, personalize your table with non-toxic paint or stain (avoid chemicals near edibles). A bright color like sage green or terracotta adds charm while reflecting sunlight away from roots.
Label your plants with mini plant markers or a chalkboard strip for easy identification. With these materials, your pallet garden table will last seasons—and your plants will thrive!
🌿